
-
Welcome to N-cars.net - the largest Hyundai N car forum. Check out the model specific sections below and scroll down for country specific forums. Scroll down for i30 N, Ioniq 5 N, i20 N, Veloster N and Kona N forums! Check out the i30 N Bible Here!
My i20N
- Thread starter YNWaN
- Start date
You are using an out of date browser. It may not display this or other websites correctly.
You should upgrade or use an alternative browser.
You should upgrade or use an alternative browser.


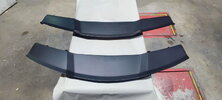



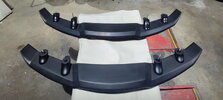

Looks totally awesome I actually think that colour is better than mine m8
Looks good in every colour mateLooks totally awesome I actually think that colour is better than mine m8
 .
.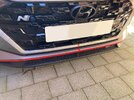

That’s amazing how outlining the bits either side of the Intercooler highlights their shape! Also I see we both have the same intercooler grilleanother idea for you
.Was a pain to template but i really like it, my vinyl isnt quite sticky enough for that plastic though apparently so might need a second go at it or scale my design down a tad as its a little thicker than i originally made
Zunsport was my first mod haha
Zunsport was my first mod haha
Oh, did you template it! I assumed you used pinstriping tape and a heat gun - you can do very tight turns if you do that. To get it to stick buy some ‘adhesion promotor’ wipes - I got mine from eBay - they work extremely wellWas a pain to template but i really like it, my vinyl isnt quite sticky enough for that plastic though apparently so might need a second go at it or scale my design down a tad as its a little thicker than i originally made
Zunsport was my first mod haha
Here are a couple of pics to update my sticker list.
So I removed the horizontal grey stripe from my rear diffuser as I thought it was a bit too much. To compensate for that I added a Nurburgring sticker but with N Performance added to it. I might redo this one in silver/grey and move it to the rear window - not decided yet.
I removed my custom centre caps from the wheels - these were gel badges and two of them have developed some kind of hazy, patchy surface finish - no idea why. Anyway, without them it looks more ‘technical‘ I think. I added the three piece thin red circular line and also the OZ Racing stickers on the rim. These I made the exact size of the official ones but also the correct size for 18” rims.
I copied the Courtenay Sport logo and added that to the front doors - then did a ‘Tuned By‘ in red to go above. That will leave little doubt when it next goes in for service .
.
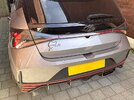


So I removed the horizontal grey stripe from my rear diffuser as I thought it was a bit too much. To compensate for that I added a Nurburgring sticker but with N Performance added to it. I might redo this one in silver/grey and move it to the rear window - not decided yet.
I removed my custom centre caps from the wheels - these were gel badges and two of them have developed some kind of hazy, patchy surface finish - no idea why. Anyway, without them it looks more ‘technical‘ I think. I added the three piece thin red circular line and also the OZ Racing stickers on the rim. These I made the exact size of the official ones but also the correct size for 18” rims.
I copied the Courtenay Sport logo and added that to the front doors - then did a ‘Tuned By‘ in red to go above. That will leave little doubt when it next goes in for service
.I did the pinstripe tape on my mirrors but the printer has been a lot more fun so went that route, plus more wasted vinyl while i could cut out the spoiler design i made in-between the front bits too. Thanks for the tip on the wipes, ill give them a lookOh, did you template it! I assumed you used pinstriping tape and a heat gun - you can do very tight turns if you do that. To get it to stick buy some ‘adhesion promotor’ wipes - I got mine from eBay - they work extremely well
I’m getting a slight, occasional rattle from the rear. I was thinking it may be the sway bar catching on the beam axle - as the beam axle is a U shape and the sway bar sits within it. But on second thoughts it could be the exhaust flap spring. As I happen to have a replacement one (N-Garage I think) I’ll fit that first.
I’ve just had a check and I have this spring - so not the one N-Garage sell:
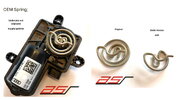
I’ve just had a check and I have this spring - so not the one N-Garage sell:
Last edited:
On further investigation I don’t think it is the exhaust spring as it opens and closes fine and I can’t hear any rattle from it when the engine is idling - so I’ve not even tried replacing it and my intermittent rattle could well be down to a bag of metal bits I had in the boot. And these metal bits relate to the job I did today and that is the replacement of the gear linkage bushes - and I have some stuff to say about that!
Now when we fitted the short shifter (which works very well I’m pleased to report) we discovered the gear linkage bushes were not easy to remove - or more specifically we found the larger bush that handles the fore and aft movement was not easy to remove - we didn’t even try the other one. However, after watching this YouTube vid we thought we understood how it all works…. But, whilst most of the vid is very helpful, there are a couple of bits of unnecessary instruction and one key point is ignored completely.
All the problems regard the bigger bush, the small one is softer and can be pushed out with your fingers (though it still pretty tight) and the linkage doesn’t need to be removed for this. The bigger one is actually moulded into the linkage and you have to break it free! Removing the end of the link, as suggested in the video is, by far, the best option. To press out the existing bush we used a big and a small socket and a large bench mounted vice. The smaller socket needs to be pretty small in diameter or the bush won’t flex enough to come out. The standard bush is already very stiff. When we came to press the (extremely stiff) replacement into place we found that heating it up with a heat gun made life a lot easier and also pressing it in without the brass insert - then add the insert after.
Refitting the head end of the gear linkage is pretty easy but there is a key point. The reason the pink clip has a half way release position is that it controls where the neutral position is. By adjusting where the clip sits on the ridged bar that runs through it you can move the gearsticks neutral position closer or further from the driving position. This is the bit the vid doesn’t mention.
The two bits of info that are superfluous in the vid are about the positioning of the larger bush - it doesn’t matter which way up it goes and it doesn’t matter which direction the moulding marks sit at. I can’t remember if he mentions the two washers that should sit either side of the large bush - these are zinc plated steel but Delrin ones would be better.
Anyway, to conclude, I wouldn’t recommend this mod - it makes almost no difference as the existing bushes are already pretty stiff. It’s true that the new Powerflex ones are even stiffer but I see you can buy solid aluminium ones and these look a lot easier to fit. Finally, Powerflex could have made these much easier to fit if they had simply moulded the larger bush in two halves…. I suspect the biggest change most will feel will be down to the fact they have randomly changed the resting position of the gearstick. If you are tempted by this mod I wouldn’t bother with the purple Powerflex bushes as I doubt they are much stiffer than the ones already fitted.
Now when we fitted the short shifter (which works very well I’m pleased to report) we discovered the gear linkage bushes were not easy to remove - or more specifically we found the larger bush that handles the fore and aft movement was not easy to remove - we didn’t even try the other one. However, after watching this YouTube vid we thought we understood how it all works…. But, whilst most of the vid is very helpful, there are a couple of bits of unnecessary instruction and one key point is ignored completely.
All the problems regard the bigger bush, the small one is softer and can be pushed out with your fingers (though it still pretty tight) and the linkage doesn’t need to be removed for this. The bigger one is actually moulded into the linkage and you have to break it free! Removing the end of the link, as suggested in the video is, by far, the best option. To press out the existing bush we used a big and a small socket and a large bench mounted vice. The smaller socket needs to be pretty small in diameter or the bush won’t flex enough to come out. The standard bush is already very stiff. When we came to press the (extremely stiff) replacement into place we found that heating it up with a heat gun made life a lot easier and also pressing it in without the brass insert - then add the insert after.
Refitting the head end of the gear linkage is pretty easy but there is a key point. The reason the pink clip has a half way release position is that it controls where the neutral position is. By adjusting where the clip sits on the ridged bar that runs through it you can move the gearsticks neutral position closer or further from the driving position. This is the bit the vid doesn’t mention.
The two bits of info that are superfluous in the vid are about the positioning of the larger bush - it doesn’t matter which way up it goes and it doesn’t matter which direction the moulding marks sit at. I can’t remember if he mentions the two washers that should sit either side of the large bush - these are zinc plated steel but Delrin ones would be better.
Anyway, to conclude, I wouldn’t recommend this mod - it makes almost no difference as the existing bushes are already pretty stiff. It’s true that the new Powerflex ones are even stiffer but I see you can buy solid aluminium ones and these look a lot easier to fit. Finally, Powerflex could have made these much easier to fit if they had simply moulded the larger bush in two halves…. I suspect the biggest change most will feel will be down to the fact they have randomly changed the resting position of the gearstick. If you are tempted by this mod I wouldn’t bother with the purple Powerflex bushes as I doubt they are much stiffer than the ones already fitted.
Last edited:
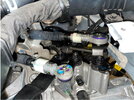
I never thought to even swap the bushes on the linkage, maybe years down the line they might wear but my gearstick to actual linkage movement is solid and 1:1 which i even checked with my endoscope when i was checking how the airtec was doing 6 months down the line without removing everything again to be sure i was all good for my 2 up coming track days
I’m not convinced the original bushes will ever wear out as such. But can you explain a bit further what you mean when you say the linkage movement is 1:1 - thanksI never thought to even swap the bushes on the linkage, maybe years down the line they might wear but my gearstick to actual linkage movement is solid and 1:1 which i even checked with my endoscope when i was checking how the airtec was doing 6 months down the line without removing everything again to be sure i was all good for my 2 up coming track days
.As far as I can see, the bushes only come into play when the gear is at maximum travel and pushed against the end stop. At that point any further movement is taken up by the bush so its impact is really very minor. The Polyflex bushes, in this case anyway, are a solution to a problem that doesn’t exist - IMO.
Seems to be one of those 'because we could' mods, but at least you tried and have them fitted anyway