As I explained elsewhere on this forum I managed to solve the problem of the cracking noises in the dashboard/windshield area of my car.
After the fix I've driven more than 500 km and the cracks seem to have disappeared entirely, even in N mode.
Fair is fair, so I must give some credit to a guy on the German forum who identified the cause of the problem (the piece of plastic trim on the bottom of the windshield, where the wipers poke through), but his fix seemed a bit dodgy to me, so I gave it a try myself.
It really is a DIY job, no need to be an experienced mechanic if you take things easy.
Right, what do you need?
- A socket wrench metric size 14.
- Some masking tape.
- Some touch-up paint or something else to make a marking.
- Some double sided tape.
- A piece of inner tube for a race bike (the one you have to pedal yourself") ) preferably for a 23 mm tire.
) preferably for a 23 mm tire.
- Something blunt (I used an allen key).
- A pair of scissors.
- Half an hour of your precious time.
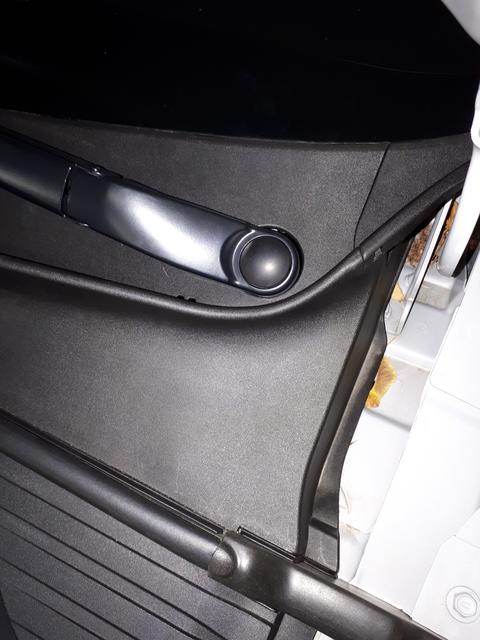
1. Open the bonnet and get the covers off the nuts for the wipers (the round covers in the picture below). They can easily be removed with your fingers.

2. Loosen the nuts that hold the wipers.

3. Now mark the position of the wipers with a piece of masking tape on the windshield and a bit of paint (or something else to make a mark with) on the thread of the bolt that holds the wipers and the base of the wiper itself. This is to enable you to put the wipers in the same position when you put them back on (sorry for the blurry picture):

4. Now comes the most difficult part: getting the wipers off their bolts. I had to wiggle them about quite a bit and the right one needed some force. You should be able to do this by hand, don't use a screwdriver or something else because that could damage the plastic trim. You could try to put the wiper upright (the long one), that helped me (no picture for this step).
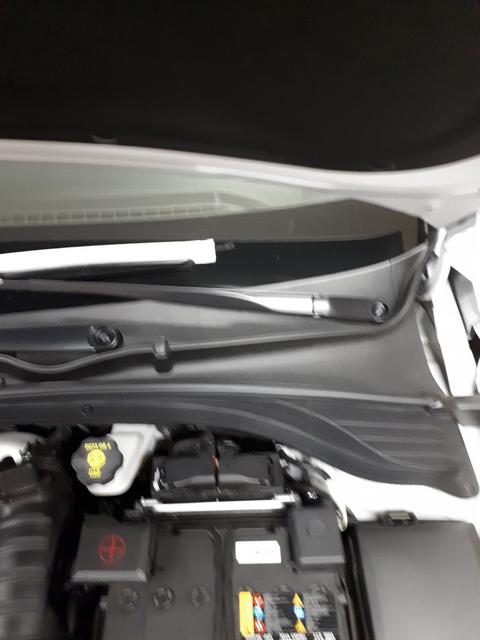
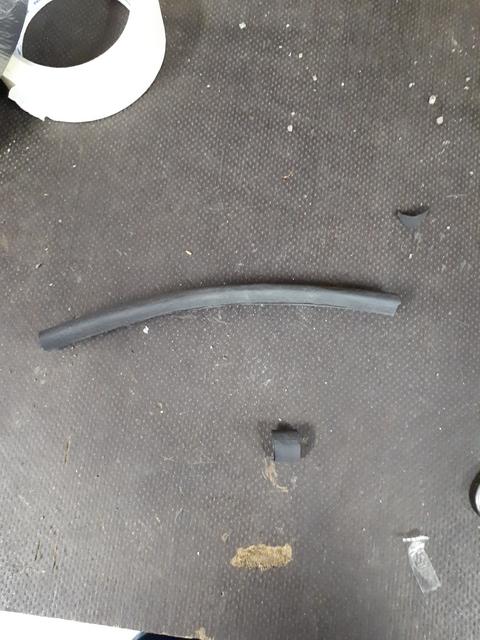
5. Remove the rubberish foam that is mounted on top of the plastic trim and that is fixed on both sides to the fenders of the car with some adhesive. Best way is to calmly pull it loose from one of the fenders. It is just pushed on to the plastic trim, so after you got it off the fender you can put it away without damaging it. In the photo it is still on the car but it shows you which piece I mean.

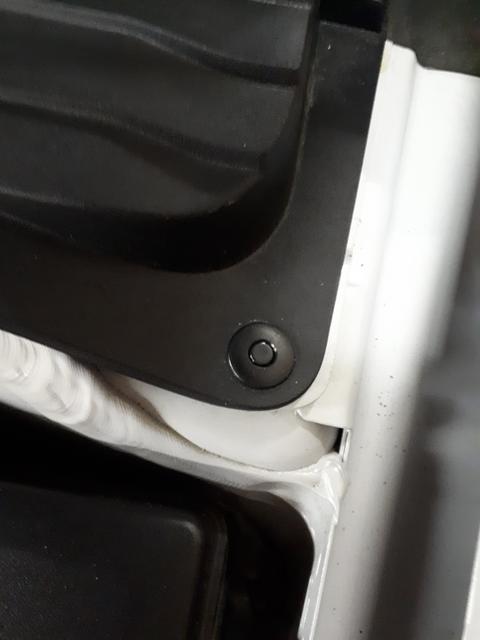
6. You now need to remove the rivets that hold the plastic trim in place. There are four of them and they are reusable. It is the round rivet in the picture below. You need to push the inner round pin down a few mm to loosen it. Use something blunt in order not to scratch anything (I used an allen key for it). When it is loose, you can lift the trim and take the fixing rivets away. Pull out the pins so you can reinstall them later.

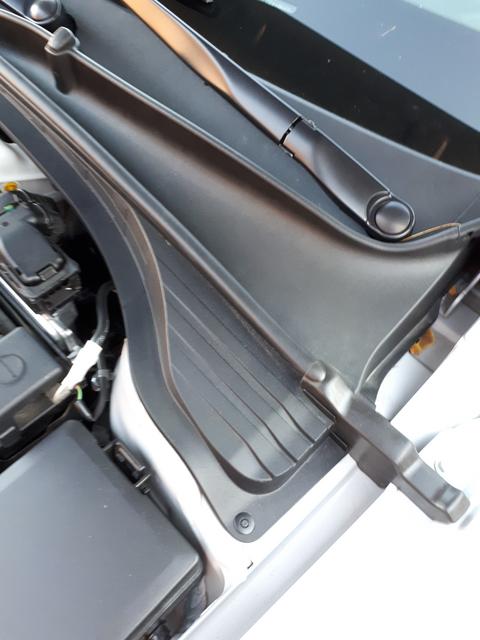
7. Now everything you need to disassemble is off the car. Take a good look at how the piece of trim is placed on the car so you can put it back in the right position. Now you need to fiddle the trimpiece of the windshield en over the wipers. You have to slide the trim piece a bit downwards from the windscreen first in order to free the fixing points of the trim. Then take the trim over the wiper bolts. Take it easy and don't put too much stress on it. Note that the movement is limited by the bonnet (at some point you might need to hold the bonnet with your hand in order to make enough room). Very important is that the tube for the windscreen washers is fixed to the trim piece, so on that side movement is more limited. Pull the trim piece back until the fixing points are visible.
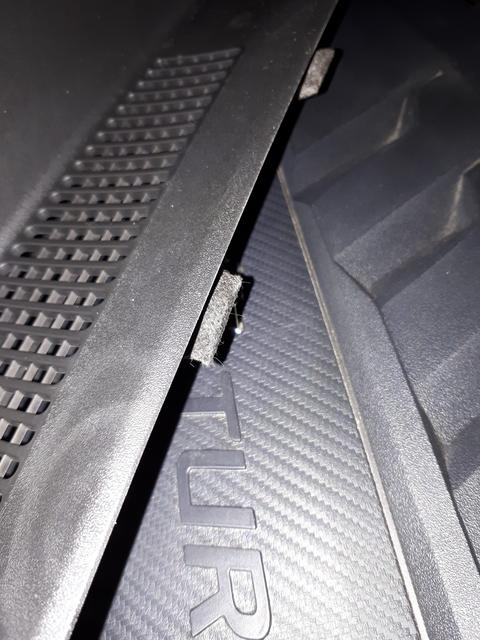
The cloth tape is what causes the cracking. I think it can't limit the movement of the trim piece on the window:

8. Now the inner bike tube comes in handy. Take your scissors and cut some pieces of about 1 cm. I think you need about 10 (forgot to count them).

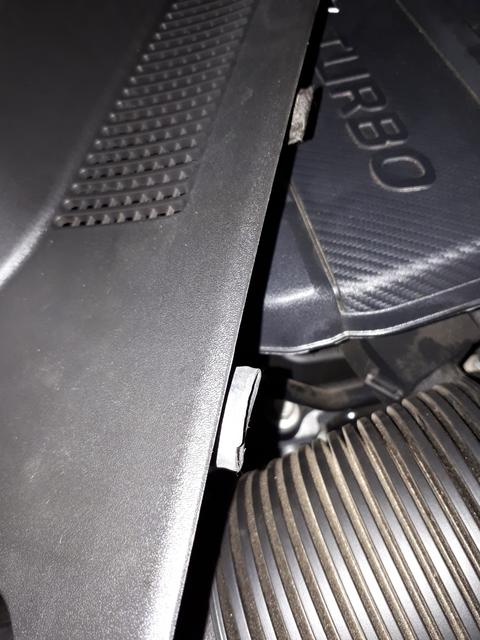
9. Now pull those pieces of tube over the fixing points (you can leave the cloth on). I let it stick out for a few mm to give me some slack when refitting the trim piece. I think the rubber fixes the trim to the windshield meanwhile giving enough room to move without cracking. The 23mm version works the best. I tried larger ones but they were to loose and fell off. This size has to be stretched just enough to secure it tight enough on the fixing point. This is how it looks (the fixing point in the front of the picture):

10. That is the job done really. Now you have to refit everything in reverse order. To refit the rivets you place the rivet and then you push in the pin until it sits flush. The pin has four splines that fit in the rivet, so check they are located in the right way before you try to push them in. Take care when you refit the wipers not to damage the splines where they are located on. Repositioning them on the right splines might be a bit of hassle, so don't tighten the nut before you checked. Push them on gently and then tighten the nut. You can always take them back off and reposition them if their position turns out wrong. Now put the covers on the nuts of the wipers and put the rubberish foam back in place. Fix it to the fender with double sided tape.
11. Take a test drive! I hope it solves your problem as it did mine...
After the fix I've driven more than 500 km and the cracks seem to have disappeared entirely, even in N mode.
Fair is fair, so I must give some credit to a guy on the German forum who identified the cause of the problem (the piece of plastic trim on the bottom of the windshield, where the wipers poke through), but his fix seemed a bit dodgy to me, so I gave it a try myself.
It really is a DIY job, no need to be an experienced mechanic if you take things easy.
Right, what do you need?
- A socket wrench metric size 14.
- Some masking tape.
- Some touch-up paint or something else to make a marking.
- Some double sided tape.
- A piece of inner tube for a race bike (the one you have to pedal yourself
) preferably for a 23 mm tire.- Something blunt (I used an allen key).
- A pair of scissors.
- Half an hour of your precious time.
1. Open the bonnet and get the covers off the nuts for the wipers (the round covers in the picture below). They can easily be removed with your fingers.
2. Loosen the nuts that hold the wipers.
3. Now mark the position of the wipers with a piece of masking tape on the windshield and a bit of paint (or something else to make a mark with) on the thread of the bolt that holds the wipers and the base of the wiper itself. This is to enable you to put the wipers in the same position when you put them back on (sorry for the blurry picture):
4. Now comes the most difficult part: getting the wipers off their bolts. I had to wiggle them about quite a bit and the right one needed some force. You should be able to do this by hand, don't use a screwdriver or something else because that could damage the plastic trim. You could try to put the wiper upright (the long one), that helped me (no picture for this step).
5. Remove the rubberish foam that is mounted on top of the plastic trim and that is fixed on both sides to the fenders of the car with some adhesive. Best way is to calmly pull it loose from one of the fenders. It is just pushed on to the plastic trim, so after you got it off the fender you can put it away without damaging it. In the photo it is still on the car but it shows you which piece I mean.
6. You now need to remove the rivets that hold the plastic trim in place. There are four of them and they are reusable. It is the round rivet in the picture below. You need to push the inner round pin down a few mm to loosen it. Use something blunt in order not to scratch anything (I used an allen key for it). When it is loose, you can lift the trim and take the fixing rivets away. Pull out the pins so you can reinstall them later.
7. Now everything you need to disassemble is off the car. Take a good look at how the piece of trim is placed on the car so you can put it back in the right position. Now you need to fiddle the trimpiece of the windshield en over the wipers. You have to slide the trim piece a bit downwards from the windscreen first in order to free the fixing points of the trim. Then take the trim over the wiper bolts. Take it easy and don't put too much stress on it. Note that the movement is limited by the bonnet (at some point you might need to hold the bonnet with your hand in order to make enough room). Very important is that the tube for the windscreen washers is fixed to the trim piece, so on that side movement is more limited. Pull the trim piece back until the fixing points are visible.
The cloth tape is what causes the cracking. I think it can't limit the movement of the trim piece on the window:
8. Now the inner bike tube comes in handy. Take your scissors and cut some pieces of about 1 cm. I think you need about 10 (forgot to count them).
9. Now pull those pieces of tube over the fixing points (you can leave the cloth on). I let it stick out for a few mm to give me some slack when refitting the trim piece. I think the rubber fixes the trim to the windshield meanwhile giving enough room to move without cracking. The 23mm version works the best. I tried larger ones but they were to loose and fell off. This size has to be stretched just enough to secure it tight enough on the fixing point. This is how it looks (the fixing point in the front of the picture):
10. That is the job done really. Now you have to refit everything in reverse order. To refit the rivets you place the rivet and then you push in the pin until it sits flush. The pin has four splines that fit in the rivet, so check they are located in the right way before you try to push them in. Take care when you refit the wipers not to damage the splines where they are located on. Repositioning them on the right splines might be a bit of hassle, so don't tighten the nut before you checked. Push them on gently and then tighten the nut. You can always take them back off and reposition them if their position turns out wrong. Now put the covers on the nuts of the wipers and put the rubberish foam back in place. Fix it to the fender with double sided tape.
11. Take a test drive! I hope it solves your problem as it did mine...
Last edited by a moderator: