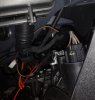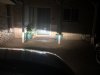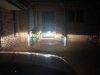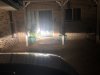

I do a bit of night driving, and as you are all aware, the lights on the N are not the best. I was looking for some form of driving light/s that would provide better light, without detracting too much from the look of the front of the car.
I was talking to a guy in the petrol station the other day. He had a light bar (LB) on his Hyundai Sonata, a very neat install, sitting just above the number plate, and I asked him where he bought it. He told me he worked for the company that makes them, and I could buy one from a truck supply store near where I lived.
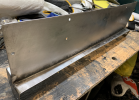
What I really liked about the LB bar was the way it mounted. The bar comes with an license plate bracket included. It is a very solid bracket:
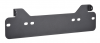
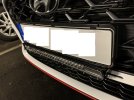
This means you attach the LB to the bracket, then remove your front number plate, then slip the bracket in between the number plate and the bumper bar, reattach the number plate (I used tamperproof screws, so it can't be easily removed), and the bracket becomes invisible, and the light bar looks like this:
(Ignore the fact my LB looks like I have joined the Fuzz, it is NOT blue, it is clear, the blue is the protective tape over the new polycarbonate lens, which has now been removed)
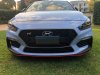
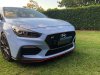
The LB is a Narva (Model 72273), made from one piece aluminium and a polycarbonate lens, and seems exceptionally well made, solid, and very water-proof. It cost me $154.64 including GST.
The LB does NOT come with an installation kit or wiring harness. If you want, you can take your car (with light already installed onto bumper) into any auto-electricians, and he will wire it in, and make sure it complies with your local laws regarding auxiliary lights. In Queensland, driving lights must be linked to the high-low dip switch, and must also be able to be turned off completely, so an additional switch is required.
OR..... you can buy a wiring harness, from the LB manufacturer, and install it yourself. Narva (Model 74401). ($55.xx including GST). Total cost was ~$211. Same thing selling on Ebay for $284.
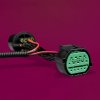
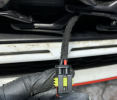
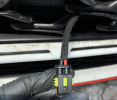
The wiring harness looks like this:
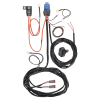
Complete with relays required, wiring, waterproof connectors, and the bypass switch (which I am working out where to mount). I think I will mount the switch INSIDE the interior fuse box, so it disappears.
There appears to be TWO plugs for additional driving lights, but in this case, I will only need one of them, so the other will be removed before installation.
It will be interesting to see how stable the mounting is (once the light is working, and I am driving). It seems surprisingly secure just held on by the two self tapping screws used to hold the number plate on. When I removed the screws, I thought, uh-oh, these alone aren't going to hold this light, and I was planning to remove the bumper bar, drill some more holes in the bar and bracket lower down so as to have at least 4 mounting points, and use stainless steel bolts and nyloc nuts to hold it all in place. But screwing the self tappers back in, they secured up nice and tightly, and I think they may be enough.
And that is where the How-To ends.... at least at this point in time. My harness is on order, should be here by Friday, and I will install the LB wiring over the weekend, take shots of where I mounted everything, and give you an honest appraisal of how effective the LB is over the standard lights.
I was talking to a guy in the petrol station the other day. He had a light bar (LB) on his Hyundai Sonata, a very neat install, sitting just above the number plate, and I asked him where he bought it. He told me he worked for the company that makes them, and I could buy one from a truck supply store near where I lived.
What I really liked about the LB bar was the way it mounted. The bar comes with an license plate bracket included. It is a very solid bracket:
This means you attach the LB to the bracket, then remove your front number plate, then slip the bracket in between the number plate and the bumper bar, reattach the number plate (I used tamperproof screws, so it can't be easily removed), and the bracket becomes invisible, and the light bar looks like this:
(Ignore the fact my LB looks like I have joined the Fuzz, it is NOT blue, it is clear, the blue is the protective tape over the new polycarbonate lens, which has now been removed)
The LB is a Narva (Model 72273), made from one piece aluminium and a polycarbonate lens, and seems exceptionally well made, solid, and very water-proof. It cost me $154.64 including GST.
The LB does NOT come with an installation kit or wiring harness. If you want, you can take your car (with light already installed onto bumper) into any auto-electricians, and he will wire it in, and make sure it complies with your local laws regarding auxiliary lights. In Queensland, driving lights must be linked to the high-low dip switch, and must also be able to be turned off completely, so an additional switch is required.
OR..... you can buy a wiring harness, from the LB manufacturer, and install it yourself. Narva (Model 74401). ($55.xx including GST). Total cost was ~$211. Same thing selling on Ebay for $284.
The wiring harness looks like this:
Complete with relays required, wiring, waterproof connectors, and the bypass switch (which I am working out where to mount). I think I will mount the switch INSIDE the interior fuse box, so it disappears.
There appears to be TWO plugs for additional driving lights, but in this case, I will only need one of them, so the other will be removed before installation.
It will be interesting to see how stable the mounting is (once the light is working, and I am driving). It seems surprisingly secure just held on by the two self tapping screws used to hold the number plate on. When I removed the screws, I thought, uh-oh, these alone aren't going to hold this light, and I was planning to remove the bumper bar, drill some more holes in the bar and bracket lower down so as to have at least 4 mounting points, and use stainless steel bolts and nyloc nuts to hold it all in place. But screwing the self tappers back in, they secured up nice and tightly, and I think they may be enough.
And that is where the How-To ends.... at least at this point in time. My harness is on order, should be here by Friday, and I will install the LB wiring over the weekend, take shots of where I mounted everything, and give you an honest appraisal of how effective the LB is over the standard lights.
Last edited: